How big a 3D printed QR code must be to scan
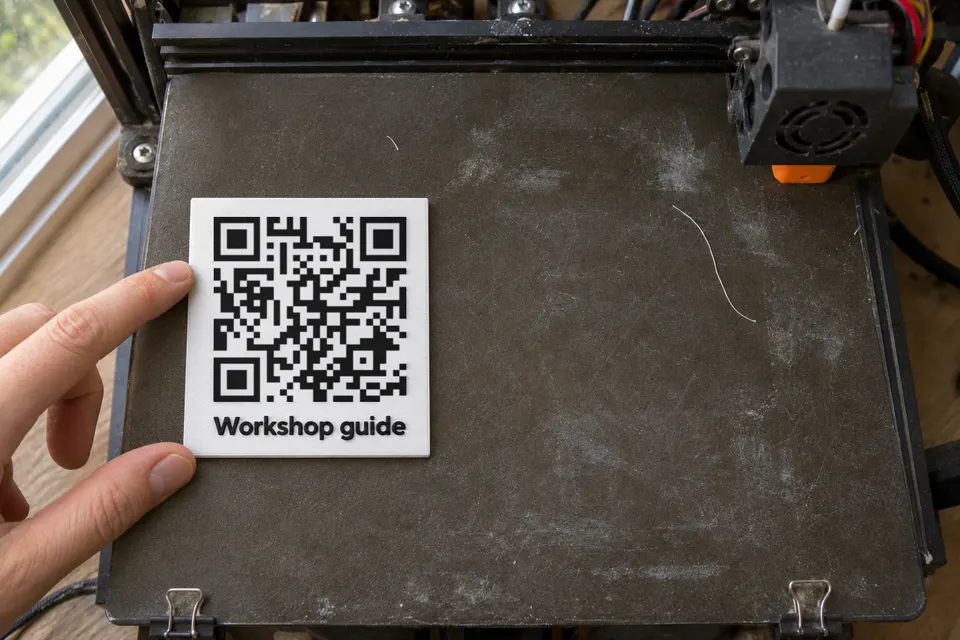
For a 0.4 mm nozzle, start at 1.2 mm per module (one square of the code) and test the finished print. That is practical sizing guidance from maker guides, not a guaranteed scan threshold. Including the blank border, total width = (modules per side + 8) × module size.
Module size on a 0.4 mm nozzle
PrintPal’s guide says to aim for 1.2 mm or more, and that modules under a millimetre print as mush on a 0.4 mm nozzle. Siraya Tech’s guide gives a lower figure: keep module size above 0.8 mm. Neither guide publishes test measurements, so treat 0.8 mm as the edge of what might work and 1.2 mm (three nozzle widths) as the starting point. Fewer modules means bigger squares at the same width, so a shorter payload prints better.
Width table by module count
A QR code of version 1 has 21 × 21 modules, and each higher version adds 4 modules per side. To find your version, count the squares along one edge of the code itself, without the blank border. The widths below are modules × module size. Code widths exclude the border.
| QR version | Modules per side | Code at 0.8 mm | Code at 1.2 mm |
|---|---|---|---|
| 1 | 21 | 16.8 mm | 25.2 mm |
| 2 | 25 | 20.0 mm | 30.0 mm |
| 3 | 29 | 23.2 mm | 34.8 mm |
| 4 | 33 | 26.4 mm | 39.6 mm |
| 5 | 37 | 29.6 mm | 44.4 mm |
| 6 | 41 | 32.8 mm | 49.2 mm |
DENSO WAVE specifies a four-module clear border on every side, and Siraya also says to leave at least 4 modules. PrintPal’s default of 2 is not the same requirement. The table excludes the border. For version 3 at 1.2 mm per module, total width is (29 + 8) × 1.2 = 44.4 mm, which leaves 4.8 mm of light border on every side.
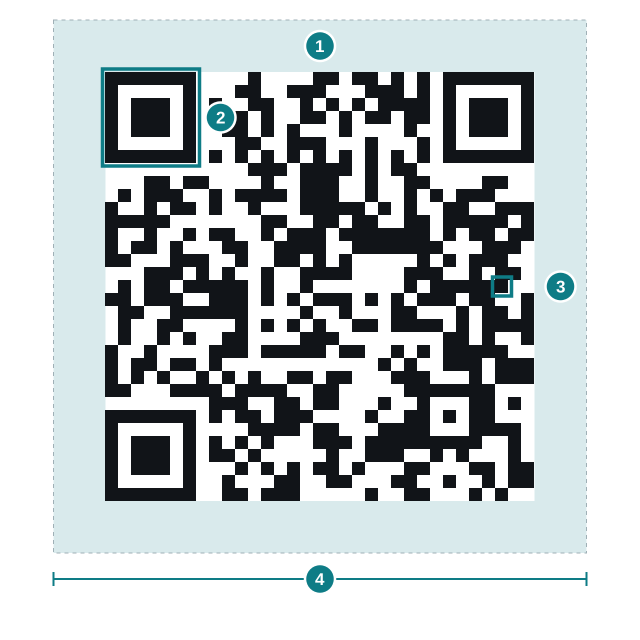
To count the modules of your own code, measure the code area and one corner square. Measure across the finder pattern’s outer square, without its light separator; ZXing’s encoder defines it as seven modules wide. Modules = code width ÷ finder width × 7. A 34.8 mm code with 8.4 mm finders gives 34.8 ÷ 8.4 × 7 = 29, so version 3. Light and dark cells both count, so do not tally dark cells alone: neighbours merge into one shape.
Colour, finish and height
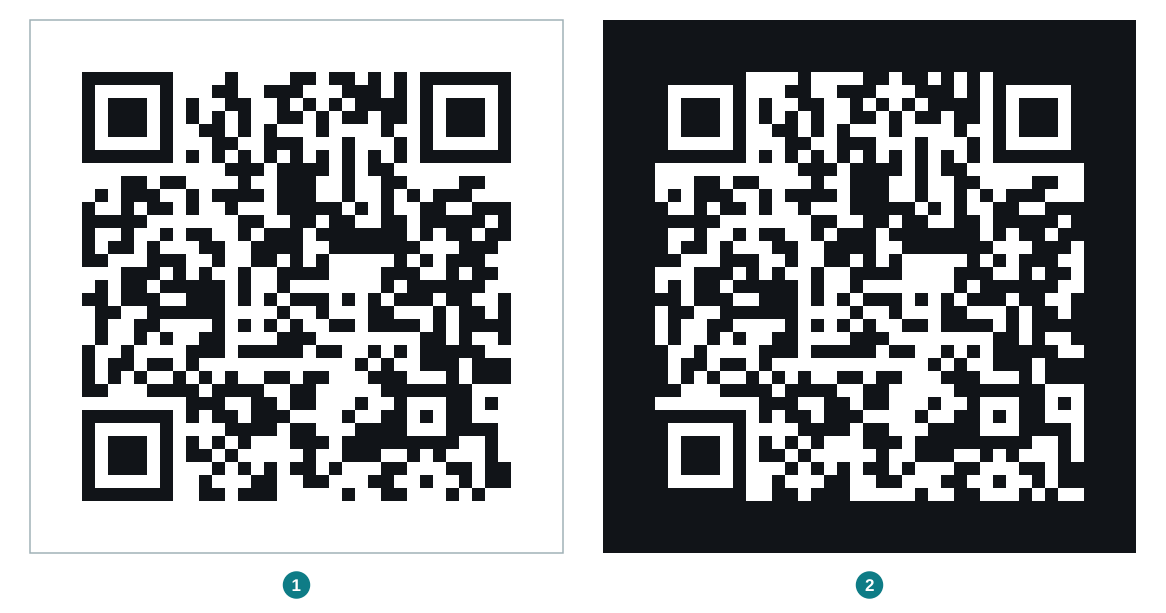
Siraya says dark modules on a light background usually scan best. PrintPal warns that navy on black looks fine in a preview and fails in real light. Siraya recommends matte materials to reduce reflections. Scan the test piece under a lamp, near a window and at an angle.
For height, Siraya suggests raising the dark squares 1 to 2 mm on a base plate at least 2 mm thick, with 0.12 to 0.2 mm layers. PrintPal’s default relief is 1.6 mm at 0.16 to 0.20 mm layers.
The model to build
Download your code as SVG. The file contains the four-module border and a background area, so its width is (modules + 8) × module size. The worked example is version 3 (29 modules) at 1.2 mm per module, with 0.2 mm layers.
- Base plate: 44.4 × 44.4 mm, 2 mm thick, in the light colour.
- Code on top, raised 1.6 mm, so the squares end at 3.6 mm.
- Code width: with the border and background kept in the file, scale the whole file to 44.4 mm, the width of the plate. With the background removed, only the squares remain; scale them to 29 × 1.2 = 34.8 mm and centre them on the plate.
- Clear border: 4.8 mm of flat, light plate on every side of the squares.
- Colour change: at the first layer above the 2 mm base. Print the base in the light filament and the squares in the dark one, using two colours of the same filament type, such as white PLA and black PLA.
- Only the dark squares rise. The light gaps between them stay open, and no raised slab fills the background.
Any CAD tool or slicer that can extrude an SVG works from this spec. Siraya describes importing the SVG into Tinkercad or Fusion, extruding it and exporting an STL. PrintPal has a generator that outputs a two-colour 3MF but needs an account to download.
In PrusaSlicer
- The SVG as a part: Add part, then SVG, with the operation on Join and a Depth setting. Set Depth to 1.6 mm.
- Scaling and position: the object manipulation panel has Position, Rotation, Scale factor and Size fields. Scale factor = target width ÷ current width × 100.
- Colour change: move the layer slider to the first layer above the base and click the plus icon. The printer pauses at that layer so you can swap filament. Check that your printer supports the filament-change command (M600 in Prusa’s documentation).
Slice, then check the preview. The base ends at 2 mm and the squares end at 3.6 mm. The light gaps are open. If a raised slab fills the background, delete the background shape in a vector editor and import the cleaned SVG again, then rescale to the 34.8 mm target.
A flush tile with two colours at one height needs another method, such as a multi-material printer.
Print the complete code at its intended size as a test, without the stand or mounting hardware. A shrunken test would check a different module size. Without an uploaded logo, a bebber code has a small bebber logo in the centre that covers some squares. Treat that centre as part of the artwork. Scan the test print from arm’s length for a keychain or WiFi sign, and from further away for a wall plaque.
Changing the destination after printing
The data inside a printed code cannot change. A static code to a web address on a domain you own keeps working while you edit that page, as long as you keep the domain and the page online. A static code that holds plain text or a phone number needs no page at all. Size depends on the payload and the error-correction level, not on whether a code is static or dynamic.
A bebber suits you if you have no website to point at, or do not want to run one. The code holds a bebber.com web address, so it has more modules than a few words of plain text and the part needs to be larger. The page behind it stays editable through the edit link bebber emails you, and it depends on bebber continuing to operate. Do QR codes expire compares what other generators say about this, checked 2026-11-17.
Make a bebber for your printed part
bebber is free, needs no account, and lets you download the code as SVG, PNG or PDF. The module count depends on the link, so create your bebber, count the modules as above, and read the width off the table.
It uses the highest error-correction level, H, which can restore about 30 % of the codewords. That does not guarantee that a poorly printed code will scan, so test the finished print. Keep the email with your edit link.
Flat engraved pieces are a different job. Laser engraving covers inverted codes and contrast on engraved surfaces. For a plaque or stand, signs has a distance-to-size rule for readable placement. Create your bebber and download its SVG.
Sources
- aim for 1.2 mm or more blog.printpal.io
- keep module size above 0.8 mm siraya.tech
- each higher version adds 4 modules per side qrcode.com
- a four-module clear border on every side qrcode.com
- ZXing's encoder defines it as seven modules wide github.com
- Add part, then SVG, with the operation on Join and a Depth setting help.prusa3d.com
- object manipulation panel help.prusa3d.com
- move the layer slider to the first layer above the base and click the plus icon help.prusa3d.com
Read next
How to laser engrave a QR code that scans
Why an engraved QR code will not scan: a test order from polarity to scrap test, a material table, and a sizing formula with a worked example.
How to make a QR code by hand: draw, paint, stencil or stitch it
A hand-made QR code scans if every square sits in the right cell and the contrast is strong. Sizing example, methods by craft and the fix for each.
How big a QR code sign needs to be so people scan it
QR code sign size: start at the scanning distance divided by 10. Size table for counters, windows and yard signs, glare, placement, tamper checks.
Ready to make your own?
Same idea, your content — done in about a minute.
Create your bebberNo sign-up. No credit card. Free forever.