How to laser engrave a QR code that scans
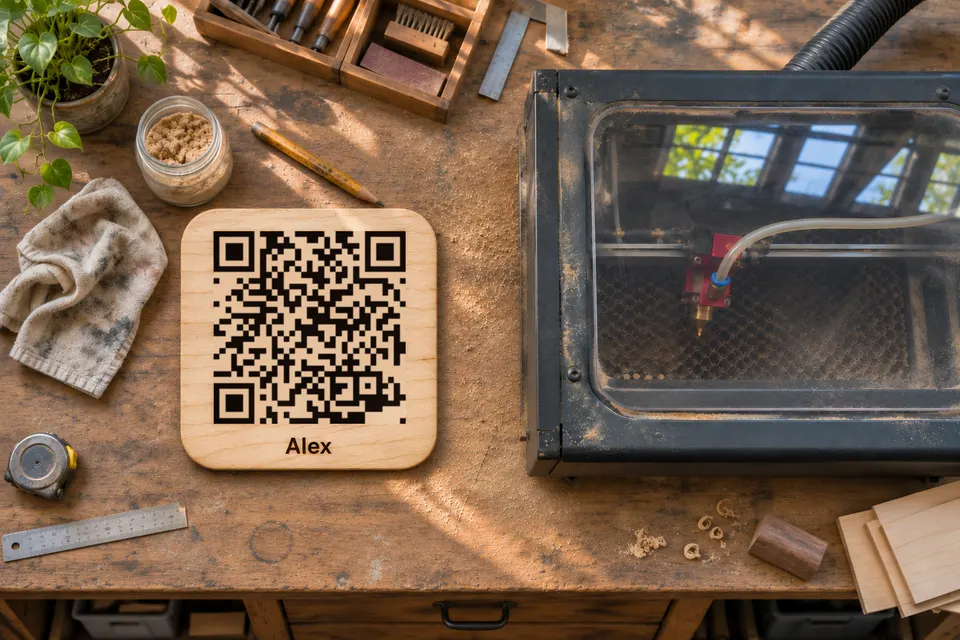
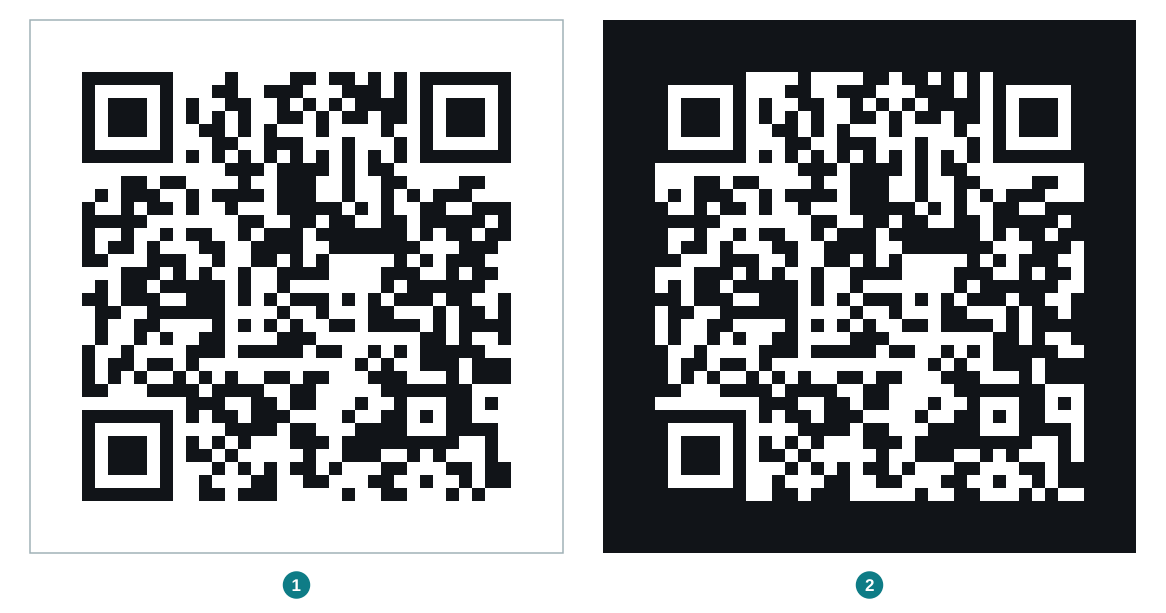
Look at the finished engraving first: are the small squares of the code (the modules) dark on a light background? If they are light on dark, the code is inverted. Scanner support varies, so prefer dark on light and test on the phones visitors will use. If it is already dark on light, the next suspects are contrast, module width and the clear border. Work through the checks below in this order before engraving another piece.
Troubleshooting checklist for an engraved code
- Polarity: check the finished piece for dark squares on a light background. If the squares are light, follow the inversion steps below.
- Contrast: the mark and the surface must differ clearly in brightness from the distance of a real scan. Wood works best “when light-colored and sanded smooth” according to OMTech.
- Filled shapes: engrave the code as solid areas, not as outlines of squares. The per-material choices say which areas to fill.
- Module width: OMTech’s recommended starting width is 0.5 mm per module. Calculate the size including the border.
- Clear border: Denso Wave says “QR Code requires a four-module wide margin at all sides of a symbol”, with nothing printed in it.
- Scrap test: OMTech says “Always test on a scrap piece first.” Use the same material and settings, and scan it from the real distance.
Source note on polarity: Denso Wave, the code’s developer, says “Basically, please print out your QR Codes with black on a white background.” The ZXing scanning library has an optional hint, ALSO_INVERTED, that “also tries to decode as inverted image” (source), so inverted decoding is an extra attempt.
Choose the engraved areas for each material
| Material | Mark looks | Artwork | Note |
|---|---|---|---|
| Light wood | Dark on light | Dark squares filled | Sand smooth first |
| Leather | Dark burn | Dark squares filled | Light, vegetable-tanned leather works best |
| Anodised aluminium | White on the dye | Background filled if dye is dark | CO₂ lasers can mark it |
| Slate | Lighter than the surface | Background and border filled | Negative Image for raster in LightBurn |
| Painted metal | Paint removed, metal shows | Depends on paint colour | Very hard coatings can resist |
| Black or white cast acrylic | Check on scrap | Pick polarity from the result | OMTech: high contrast, clean lines |
OMTech says leather “works best on lighter or vegetable-tanned surfaces”. For anodised aluminium, Epilog says a CO₂ laser “turns it white and provides excellent contrast on the many different anodized colors”. For painted metal it says “even a low powered CO2 laser is very effective at removing paint from most metal surfaces”, while some paint coatings are exceptionally hard. This table gives no engraving workflow for clear acrylic, glass or untreated bare metal.
Invert the artwork when the laser marks light
On a material that marks dark, such as light wood or leather, engrave the code’s dark squares as filled shapes.
On a dark material that marks light, such as dark anodised aluminium or slate, engrave the light background and the border, and leave the dark squares untouched. In LightBurn, vector inversion works by an enclosing shape on the same Fill layer as the code, and each further enclosing shape flips the filled areas again. So first check what the file already contains.
A bebber SVG already contains the four-module border and a background shape behind the squares, so do not draw another rectangle around it. Steps for a bebber SVG:
- Import the SVG and set its width to the total from the size calculation below, border included. A 33-module code at 0.5 mm is 20.5 mm wide.
- Put the code’s shapes on one layer in Fill mode (or Offset Fill mode).
- Check the result in the Filled view style (Alt/Option+Shift+W). The background and the border should engrave, and the squares should stay untouched.
- If the preview shows the squares filled instead, the file has one enclosing shape too many or too few. Count the shapes that surround the whole code: exactly one must remain, and it must reach the outer edge of the border. Delete a duplicate, or add the missing one on the same layer, then check the preview again.
The centre of the bebber code carries a small bebber logo unless you upload your own. It covers some squares, so treat it as part of the artwork and include it in the scrap test.
For a symbol-only SVG from another generator, set the symbol to (modules × module width), draw one rectangle around it that extends four module widths beyond the symbol on every side, put it on the same Fill layer as the code, and check the Filled view.
For raster images on slate, turn on Negative Image in the Cut Settings Editor or Adjust Image (see LightBurn’s troubleshooting page). The Preview window’s Invert switch “makes no difference to how your laser will actually engrave your graphics”.
Prefer SVG for this workflow, since it keeps the module edges sharp when resized.
Calculate the size including the border
Total width = (modules per side + 8) × module width. The 8 is the four-module border on each side. A bebber download already includes that border, so its image width is this total and module width = image width / (modules + 8).
Suppose your code has 33 modules per side; this is not a bebber module count. Using OMTech’s recommended starting width of 0.5 mm, the total width is (33 + 8) × 0.5 mm = 20.5 mm, border included. A 0.7 mm module gives (33 + 8) × 0.7 mm = 28.7 mm.
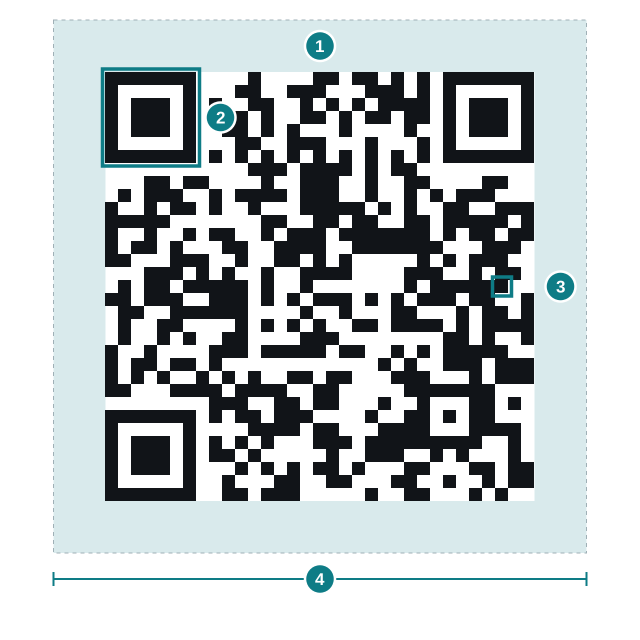
At a 0.1 mm line interval, a 0.5 mm module spans five line intervals. Inspect the scrap test for merged squares and lost gaps. A shorter encoded address can reduce the module count; compare the generated codes at the same correction level.
Denso Wave notes that a higher level suits environments where codes get dirty and enlarges the code. Level H restores about 30 % of the codewords at best, which is not a share of the surface and not a guarantee for any given damage.
A static code or a bebber for an engraving
An engraving cannot be changed, so the address in it has to stay reachable. A static code that points at a web address you own works well if you have a website you can edit and will keep the domain. You can update that page as often as you like.
A bebber suits people who have no website to point at or do not want to run one. You create a bebber page, get the code, and edit the page later through the edit link sent by email. Because the code holds a bebber.com link, it has more modules than a short text code, which means smaller squares at the same plaque size.
It also works only while bebber keeps operating. For fixed content such as a serial number, a static text code is the simpler choice. More on lifetime: do QR codes expire.
Create your bebber for the engraving
A bebber is free and needs no account. Create your bebber page, then download its QR code as SVG for vector artwork. Count the modules in your own code, then use the size calculation above. There is no expiry and no scan limit. Related pages: 3D printed QR codes for module sizes with a 0.4 mm nozzle, and dog tags for what a finder needs on a pet tag.
Create your bebber page and download the SVG.
Sources
- OMTech omtech.com
- Denso Wave qrcode.com
- source github.com
- Epilog support.epiloglaser.com
- vector inversion docs.lightburnsoftware.com
- troubleshooting page docs.lightburnsoftware.com
- higher level suits environments where codes get dirty qrcode.com
Read next
How big a 3D printed QR code must be to scan
3D printed QR code sizes for a 0.4 mm nozzle: module size, the four-module border, a width table and printing steps in PrusaSlicer.
What to put on a QR dog tag, and what to leave off
A QR code on a dog tag adds to your phone number and microchip; it does not replace them. What a finder needs, three sellers compared, and a free bebber.
How to make a QR code by hand: draw, paint, stencil or stitch it
A hand-made QR code scans if every square sits in the right cell and the contrast is strong. Sizing example, methods by craft and the fix for each.
Ready to make your own?
Same idea, your content — done in about a minute.
Create your bebberNo sign-up. No credit card. Free forever.